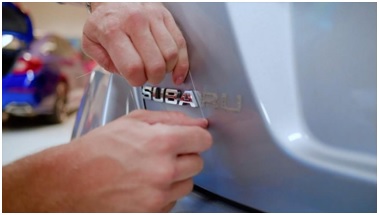
Ever wondered how to remove or add emblems on your car? This is a very simple task that you can do yourself with a little guidance. Car emblems can be used to identify the vehicle’s make, model, and any other special features. The emblems can also be used to identify the dealer where the vehicle was purchased. You may need to replace the emblems on your vehicle if they become worn or damaged. Your emblems can be replaced by taking out the damaged ones and placing new ones in the same place. Below, is a guide on how to install and remove car emblems.
Step-by-step Instructions on How to Remove and Install a Car Emblem
1. Gather Your Tools
Gathering the necessary tools for car emblem removal is the first step. Most people prefer to use glue removers as they help loosen the glue while keeping the paint intact. A scraper tool is an option, but it’s risky. You only need to remove the emblem and not the paint. Some people prefer to use a heat gun or hairdryer, but this is fine as long as the paint doesn’t get scorched. Next, you will need a length of thin string. Both craft bead strings made from plastic or dental floss are excellent options. You can also apply an emblem precisely using a flexible ruler or bubble level. This will ensure that it looks great and you can visualize the spot by using masking tape or dry-erase markers.
You will need to purchase an emblem adhesive from your local auto shop if you plan to add an emblem to replace the one you have. A double-sided tape is an option if glue seems too messy. Make sure the tape is strong enough to withstand rain or other adverse weather conditions.
2. Remove the Old Emblem Adhesive
Now that you have all the tools, you can now begin with the removal of a vehicle emblem. You can use the adhesive removing solution to heat the emblem until it moves a bit. Continue working until you can get something behind it.
3. Take the Old Emblem Off Your Hands
Once you have reached this stage, slide your plastic beading or dental floss under the emblem’s edge. You will need to work it in a sawing motion behind the emblem until it is free. Apply more adhesive to loosen a knot or use the hairdryer for assistance. However, this technique works for most of them. It is difficult to get started. Once you can see the emblem and begin sawing with the beading or floss cable, things become much easier.
4. Clean the Area Before Installing the New Emblem
Once you have removed the old emblem, it is time to prepare the area where the new one will be placed. This is the last step if you do not plan to replace your old emblem. The best car surface cleaners keep the paint intact and remove any wax, grime, or adhesive residue. Alcohol is great for spot cleaning because it evaporates. Special adhesive removers can be used for vehicle care too.
5. Draw a Plan of Where You Want to Place the New Emblem
It’s now time to prepare the area for a brand-new emblem. The most difficult part of the entire process is vehicle emblem placement. However, if you have all the tools and the right knowledge, it’s possible to do it. This is how to place a vehicle emblem onto your car. Take a flexible ruler and measure the area where your emblem should be. Begin at the trunk’s edge or any other physical feature. People sometimes look at it too closely, which can cause emblems to be slightly off-center. This is not a good thing. You’ll be rewarded if you measure precisely for precise placement. Once you’ve identified the spot, use dry-erase markers or masking tape to mark it. These guides will assist you in holding the emblem in place until the adhesive dries.
6. Use the New Emblem
You will need an adhesive glue or double-sided tap to attach the emblem to your vehicle. Some emblem manufacturers offer a peel-off adhesive backing so that you don’t have to use your tape. You can use dry-erase markers and masking tape to help you. You will need to ensure that the emblem adheres to the car’s surface if you are using emblem adhesive. This is a crucial step as a weak hand or slipping emblems can cause them to look off-kilter.
7. Clean Up
Cleaning up any traces of work is the final step. You can use your adhesive remover for wiping off excess glue around the emblem’s edges. Apply some alcohol to the area, and then add a little wax to restore the paint’s sheen.
Final Thoughts
Car enthusiasts are surely fond of custom car emblems as these represent them too. Also, installing and removing emblems are usually not that difficult if you just do proper research and be careful with the steps. However, if you are not confident to do this on your own, you can always ask for an expert’s help.


